I started writing when I was 8. My mom got me a journal where I could rant (prob so I won't be an annoying brat). I stopped writing for 8 years until the pen and then later on the keyboard called on me again. I blog because I like writing and that's just about it. Hope you get inspired though... Bite the apple!
Making a new sewing machine cover has been on my to-do list for 3 years now. We were still in Singapore the last time I made one and I made it by hand. I've learned a few tricks since then and made this one mostly by machine. I embroidered some parts which is why it took longer than I expected.
Anyway, I did the cat first and made the base really simple. Just huge strips of denim-like fabric. I think I went for monochromatic tone since the sky has been pouring rain for at least two weeks now.
I think it turned out cute and it matches the covers I made for my kitchen appliances. Here's how it turned out:
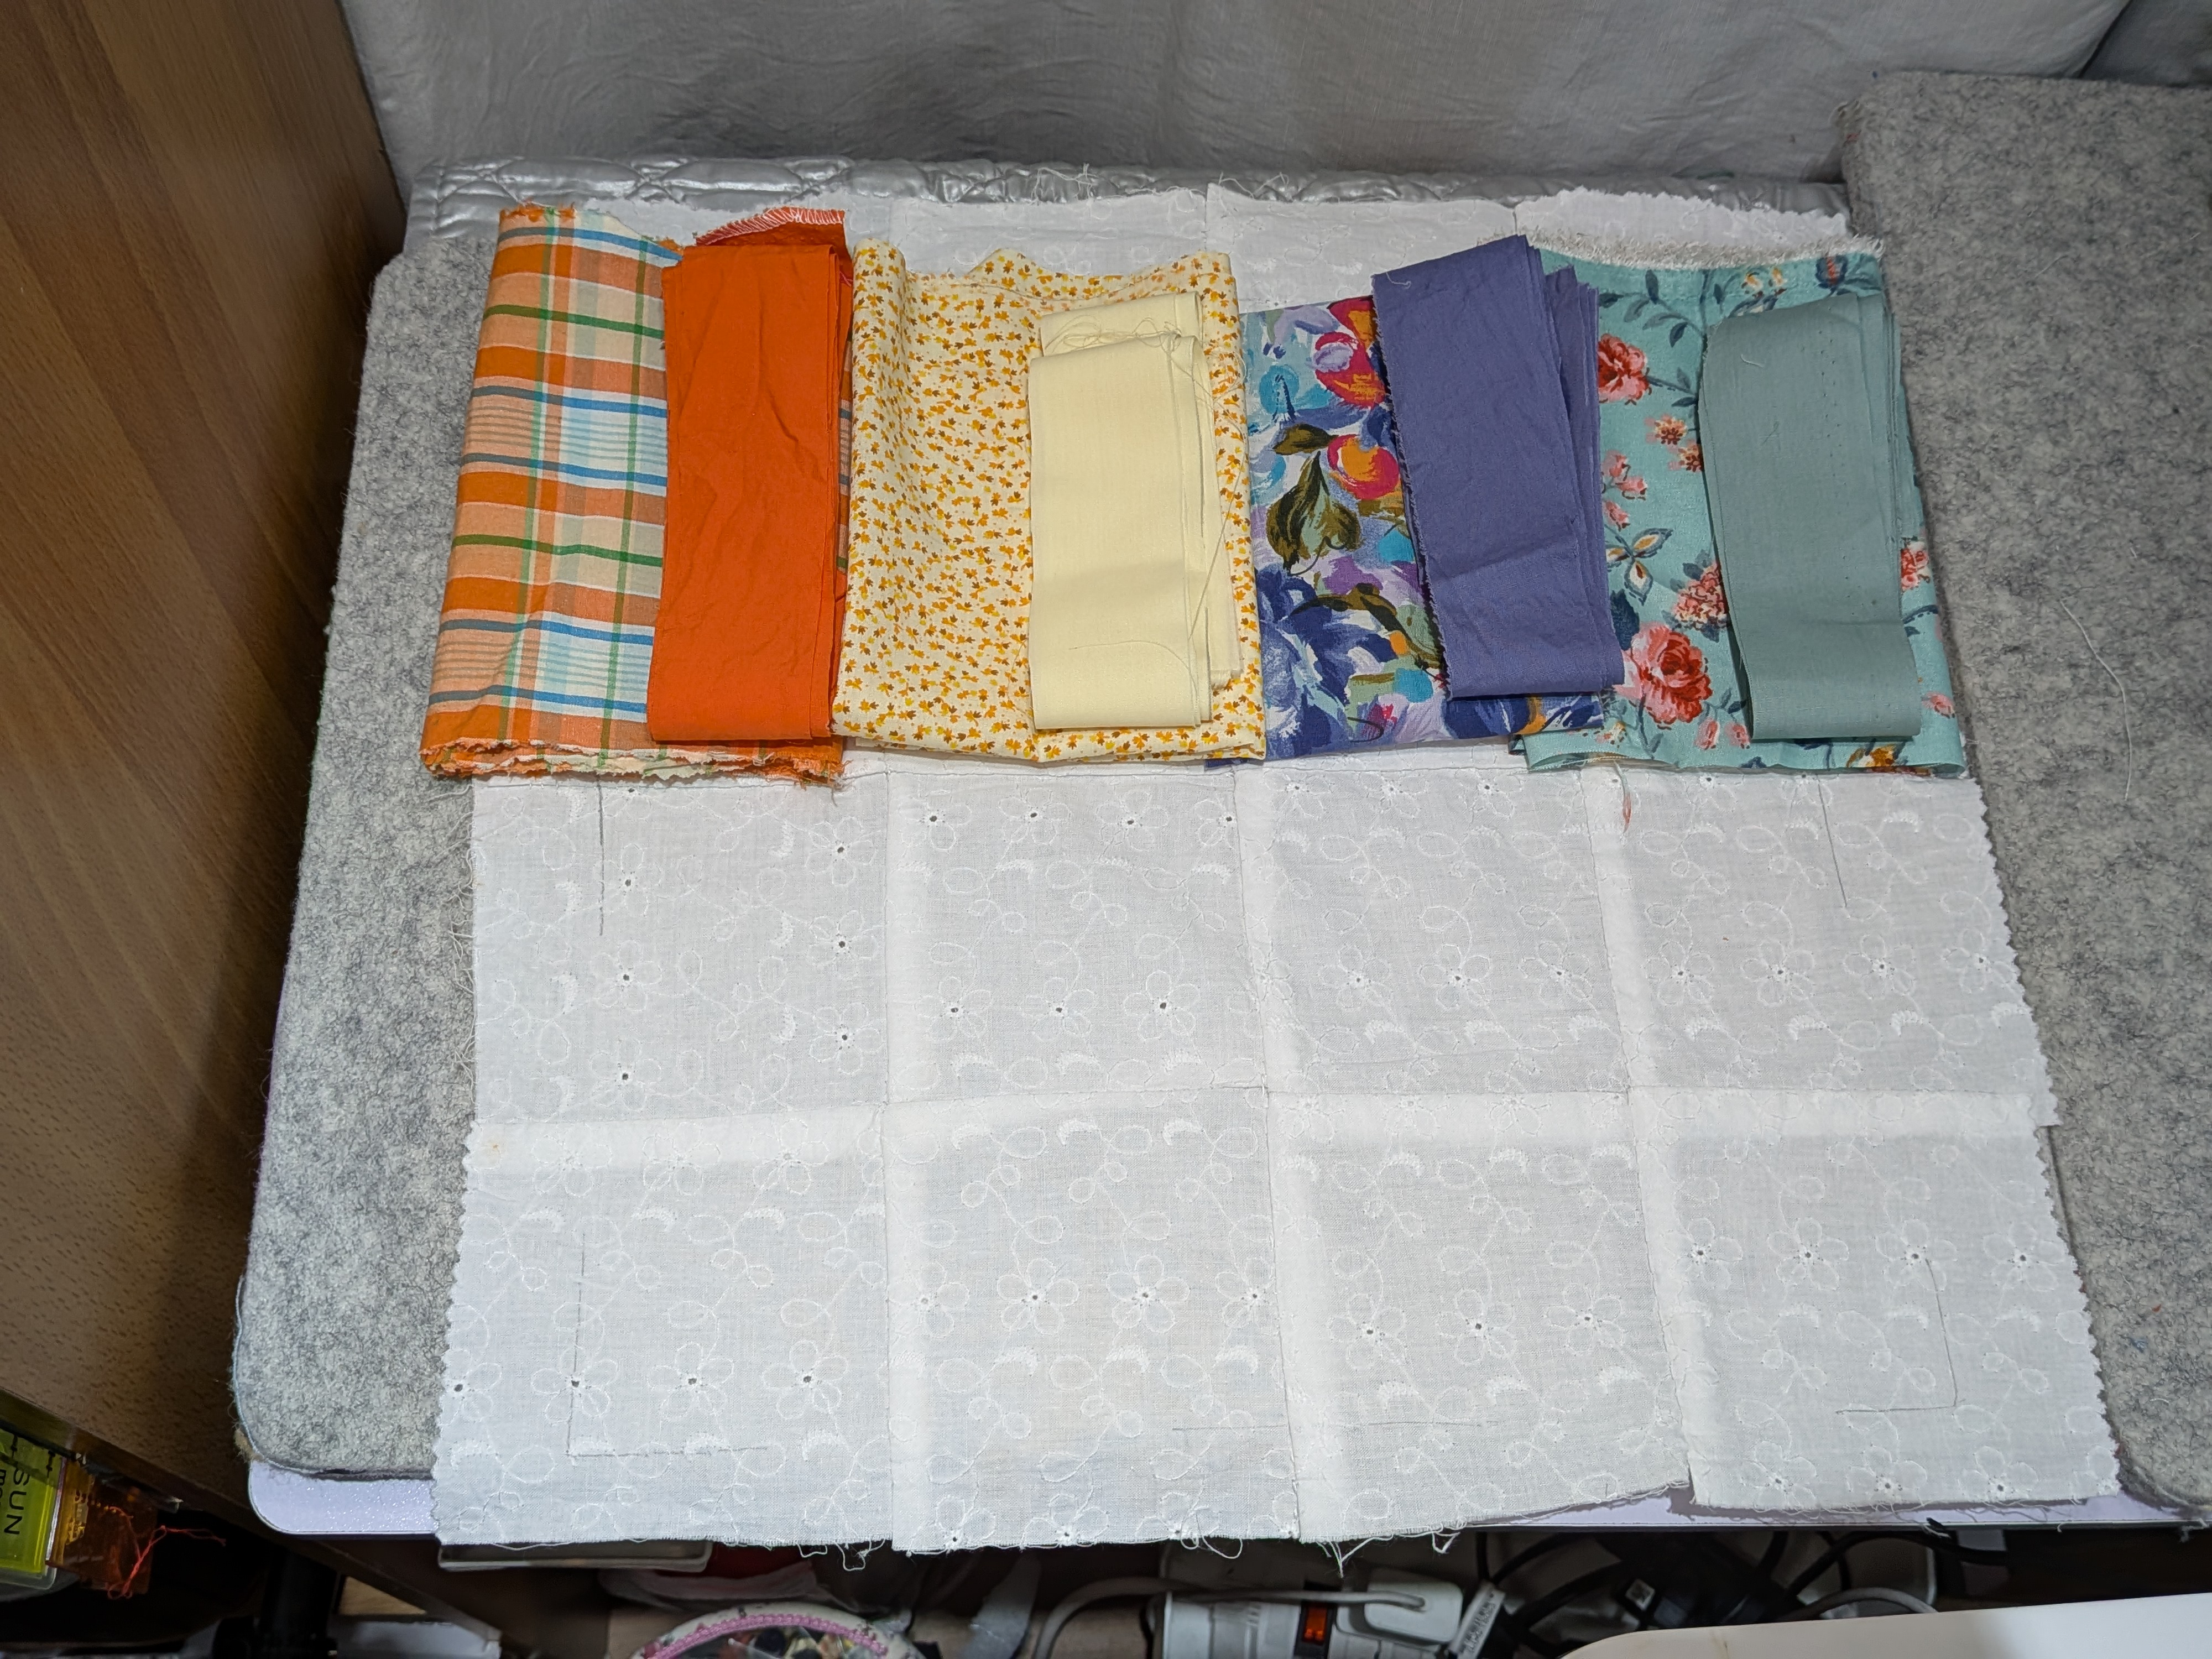
I found six squares of pieced together white fabric. It was hand sewn by Mom. I looked at it for a long time before I decided to make throw pillow quilt covers with it. I also used some of the scrap fabric she left. I broke this project into two parts.
The first part of the project was for the bigger throw pillows. It was perfect because there were two larger squares. I took the chance and experimented on making cats. I posted about it a few weeks ago (check it out here). The second part was to make four throw pillow covers for the smaller pillows.
The squares were not even, so I decided to simplify and just added scrap fabric to the sides to frame the white squares. I wanted to highlight the fabric Mom used (eyelet? I'm not sure what it's called) and I chose some of her scrap fabric to frame it. I quilted diagonally to add some flair.
Here's how I made it:
Mom still has a lot of unfinished projects. No wonder she kept telling me to finish what I start because she left a lot of stuff for me to finish. Most of her unfinished projects are big enough to make more throw pillows. I have to wash all of them and see if maybe I can make a blanket out of them. Well, we'll see. I'm just glad I managed to make something out of her unfinished project :)
I hope I have gone through the last box of Mom's craft materials and projects. She left a lot of unfinished projects and I've been trying to figure out what her plans were for it. Some were probably meant to be throw pillow covers. I know she liked making them. Others were probably part of blanket projects.
Since a lot were mismatched I thought I'd just make something that would be useful. I started with blocks of white fabric she pieced together in squares. I washed it and removed the batting before I started to work on the project. Here's what I did -
It took a while to finish since I stopped sewing for a few months. I needed more time to sort her things and it eats up a lot of time. I got exhausted and needed a break, so I decided to work on her unfinished projects. Mom also left a lot of scrap fabric, so I integrated it into the project. I want to add to my sewing skills and using scrap fabric allows me to be more experimental.
A friend of mine mentioned on X that the most popular gadget used during the elections is the Jisulife fan. I have a fan, but it's not Jisulife (haha) and maybe I'll make a case for my Tylex fan next time. One thing that I use regularly is a mini air purifier. I have severe asthma and use it whenever we go out. It's just annoying that the switch easily turns on whenever it's in my bag. The solution was to make a protective case for it.
I made the case as a learning project since I haven't done anything to cover a rounded gadget. Of course, I used scrap fabric from a previous project so I don't waste any of my precious stash (haha). It was quite easy to make and I'll probably make another one soon to improve my craft. Here's how I made it:
While sorting my Mom's stuff I found the hand sewn wallets I made when I was a child. Mind you, I actually used them in school (not much to put inside anyway!). I giggled when I found it and I'm lucky I couldn't find the photo of the project because it was obviously the work of the child who was only starting to sew, hahaha (I honestly don't know why my Mom still kept it!).
Anyway, I needed a card holder. Those rewards cards from shops accumulate and I couldn't close my wallet anymore. I had some scrap fabric from a previous project and so I decided to use it for this project. It was easy to make and I'm happy I now know how to make a holder with several compartments. Here's how I made it -
Easy peasy as long as you understand the logic for folding the fabric. If I put my mind to it I could probably make this as a Christmas gift. If you'd like to make it, you can check out the tutorial on my sewing blog.
Now I need to check what other cases I need for my stuff :)
Mom left a huge stash of fabric and retaso (scrap fabric). It took me months to go through it and I'm honestly not done yet washing it. I found one really cute embroidered fabric, I believe normally used for dainty dresses. It was white, but was in a bad brownish state from being kept for many years. It took me a week to restore it to almost white.
I set aside any delulu plans of sewing a dress or skirt. I'd probably fail since I don't really know how to sew clothes! After months of pondering I decided to make a curtain. The fabric was long enough to make one for our kitchen window.
But alas! It wasn't long enough. I decided to be creative and thought about adding fabric to make it longer. I was inspired from browsing a book on curtains at Booksale (I regret not buying it!). Anyway, I decided to use denim-like fabric to keep it neutral.
Mom also left some lace. It also took me awhile to restore their color to white. I think she got most of them when she was teaching me how to quilt when I was a child, so you can just imagine how long they've been in storage. Anyway, I added some lace as an accent.
Here's how I made it:
And my new summer curtains!
Now I have dainty kitchen curtains. The denim add-on matches my cat kitchen covers. :)
For measurements, https://www.needleadventures.com/2025/04/diy-dainty-summer-kitchen-rod-pocket.html
I was really curious whether Pinterest grids of characters would work as a quilt. Since I had a lot of yellow fabric, I decided to make a Pikachu quilt. I originally intended to make it as a throw pillow case, but it was too cute. I decided to turn it into a wall hanging since we don't have anything on our walls.
I started the project last August. I was busy with other things. I worked on it on and off and piecing together 400 1"x 1" squares wasn't easy. I had to take breaks in-between to rest. The hardest part was hand quilting across the project. I'm happy I now have a Pokemon wall decor-a homemade one!
Here's how I made it!
Will I do it again? Maybe. I definitely want to have a Yoda one and if I have more energy maybe I'll complete the Pokemon starters.
I like making heart quilts. I saw this really cute heart quilt on Pinterest a few years ago. It took me awhile to figure out the measurements, but that's part of the fun whenever I make a quilt project. For this summer I thought I'd make different quilt projects using this design.
The least thing I like doing whenever I make quilt projects is measuring and cutting fabric! I know it could be easier if I use a roller blade to cut fabric, but I'm scared of the roller blade (plus I'm a bleeder). I also noticed that roller blades get dull easily. I'm probably not using it correctly, so I just cut fabric the traditional way (ruler + scissors). It takes longer, but it's a safer way for me.
So I got busy the past week measuring and making multiple hearts. Here's how I made it:
After I'm done making multiple hearts I'll work on several cute projects. There's going to be a disruption though since we need to vacate the basement again for some repairs. It means I need to empty my craft room again. Gah.
Measurements available on my sewing blog: https://www.needleadventures.com/2024/03/make-multiple-heart-quilts.html
You probably have an old shirt or pantulog that you couldn't let go of. You want to wear it until it's down to its last thread. We do have those in our home and if it's a pair I usually replace the garter to extend it's life. We all have this and usually at the end of its life it has nowhere to go, but the trash can. It would be too embarrassing to donate.
We have been decluttering and sending our pre-loved items to NGOs. There are items though that are just not useful anymore. Most are old garments that are not meant to be worn anymore. My Mom used to cut up old towels to become rags, so I thought I could do the same for "over loved" garments.
I needed to improve my sewing machine skills, so I thought I'd make round rags (trapo/basahan). I used a small round biscuit tin can to draw circles on the garments. Some were so thin already they were hard to cut (haha)! Luckily I got strips of shirts from a fragile item I ordered. I used it as a filling for the rags. It was really easy to make, i made 10 pieces over the weekend.
Started this year's crafting activities by making a cute Wonder Woman tote bag. It was inspired from a jute bag a friend used to send a gift. I super liked the size of the jute bag. In fact, I use it everyday to transport my stuff from room to room. I carry a lot of stuff whenever I leave our bedroom, so it's worked perfectly for me.
I've had the jute bag for awhile now, so thought I'd make a similar one, but with a twist. I still have some Wonder Woman fabric, so I thought I'd start strong this year with an iconic character. I also want to give the piece as a gift to a friend who loves Wonder Woman.
I immediately cut the fabric after I figured out the sizes of the pieces. Piecing them together was easy. I learned a lot through the years and made sure to use fusible interfacing to stabilize the fabric. What I didn't count on was not finding my stash of bag handles. I brought home some from Singapore and was counting on using it for this project.
Ahh, another learning moment for me. Did some research on how to make bag handles, so I just made a basic one. Next time I'll try making it rounded. I'm actually surprised I got some good views on my post on "how to make bag straps". I guess I was just on the same boat as many other people. (Go watch it yes?).
I love how it turned out. Holding onto this until I finish two more for my food train crew. I'll make something different for the other two. I'm sure my friend will see this when I post this! Haha! No worries! It will be with you soon!
More info about this project: https://www.needleadventures.com/2024/01/wonder-woman-tote-bag.html
I'm so excited to start sewing and quilting again! I usually start the year with something useful and fun. I've been wanting to make my own version of the popular jute bag used during the holiday season for gifts. I like the shape and size.
A friend gave me one and I've been using it to carry my stuff around the house. My tablet and phone fits it perfectly. I also bring around some essential oils in case I get a headache or need to stop an allergy. I have a collection of character fabric, so that's what I experimented on.
As I happily assembled the bag, I told myself I could finally use the straps I've bought in the past. When I started assembling the bag I couldn't find the straps! My craft room is currently in a bad state. It's messy because I'm also sorting through boxes from my childhood home. Since I couldn't find the straps, I challenged myself to DIY it!
Good thing I had materials to make straps. It was quite easy to make (see video above). Next time, I'll try to make the rounded ones. I'm happy I was able to add a new sewing skill! Will share next week, how the bag turns out!
More info about this project on my sewing blog: https://www.needleadventures.com/2024/01/how-to-make-bag-strap.html
Consistently working on my quilt projects proved to be challenging last year. I had to evacuate my maker room a couple of times. After storing my supplies, I eventually set-up a "satellite" sewing table in the family room. I spend more time there with Sweetie so we could save up on electricity.
To warm up, I made new curtains for the kitchen. I love using swiss dot fabric! I originally wanted to have proper curtains made for our living room, but the cost is so steep! I can make 30 sets of curtains from the price I was quoted, so I'll just continue to make our own to save and have fun. Anyway, I made another set for the kitchen last October. Still used swiss dot fabric, but I used corn blue this time.
By April, I started on my cat quilt projects. I needed new covers for my kitchen appliances. I also wanted to learn to make new patterns. Went to Pinterest for inspiration and from that I managed to make covers for my KitchenAide stand mixer, blender and food processor.
After the cat themed quilt project. I rested for two months. My arm hurt and I realized I shouldn't sew by hand too much. When my arm healed, I resumed by making a special Sanrio themed project. I made a customized laptop sleeve and pouch for a friend. I was so relieved when she told me her laptop fit perfectly!
The second theme for the year was making useful items from the scrap fabric I've collected for a couple of years now. I was able to make a lot of projects out of it: potholder, small wallet, essential oil pouch, coffee pot rug, coaster, notebook cover, pincushion and tablet case. I could've gone on and on, but I knew it was time to work on my Christmas theme projects.
Just before I started work on my holiday projects, I made a special baby pinwheel quilt for my nephew's daughter. I finally busted out the special fabric I bought in Japan a few years ago. I knew I wanted to use the fabric for a baby quilt. I wanted the colors to be something my Mom would have used. I paired the special fabric with apricot fabric from Singapore and wadding from Australia.
I ended up just making two holiday quilted items. I got sick so I was useless for six weeks! I still managed to make a holiday pinwheel potholder and Santa potholder. Will just make more for Christmas this year and will probably start earlier!
You can watch tutorials on how I made these projects on this playlist: https://youtube.com/playlist?list=PLOKtaK29-LI6EWUsXEE6LReY2UDY_RsME&si=JKS97LeC515X1uhr
I'm happy I was able to do a number of projects last year. It kept my hands and mind busy. I look forward to seeing what I'll come up with this year!
I think I finally used up all the tiny triangle scrap fabric. I wanted to use all of it, but it was hard to make something cohesive with it because of the variety. After moving around the joined triangles, I eventually decided to make a pincushion. I have another large cube pincushion I made from scraps years ago. Since it's looking a bit forlorn already, I thought it was time to make a new one.
It honestly took me a few days to figure out what to do with the scraps. I also wanted to use it all up already, so I could move on to my other scraps. I also realized I need to start working on my Christmas project soon. Took a shortcut and made the scraps into a pincushion.
The tiny triangle scrap fabric seemed bottomless. They came from making bias tape. Took me awhile to sort them and that made it easier to plan what to do. What I didn't anticipate was how small they were once pieced together. Each square was just 0.5" x 0.5" after piecing it together with others. Tried matching all the scraps and it didn't look nice.
Then I asked myself, "What would Mom do?" Mom wouldn't have touched such tiny pieces, haha. I think should would have instead used it for her paper projects as accents. She'd probably turn them into a flower. I was bent on creating something from it. I was able to make a 3.5" x 3.5" square out of a set. The best thing to do with it is make a coaster.
One can never have enough coasters at home. They are like pens that magically disappear after some use. So I think that's what I'll do when I collect tiny triangles again or other smaller scraps. I haven't even done a crazy quilt yet. Maybe I'll do that for the other scraps.
Turned out quite okay. The imperfections were masked by the black scrap fabric. The triangles weren't the same size, so it was really difficult to piece together. It was fun to do nonetheless. Hmm, I still have more tiny triangles. Let's see what I can come up with next week.
We've been using cork potholders for a few years now. After I finished making a potholder from scrap fabric I thought maybe I could make a coffee pot rug. We make coffee everyday and we normally just leave the pot on the counter. I wanted to replace the cork to make the stuff on our kitchen counter livelier.
Gathered the tiny triangles I chopped off to make binding. It was quite a lot. Took me a few days to realize that the triangles could only create 3" x 3" squares (or smaller). Eventually decided to just use the tiny triangles as an accent. I think it turned out cute.
Here's how I made it -
I guess you can call it a potholder too since I used insulation wadding for it. It's amazing how the insulation wadding can keep heat out even though it's quite thin! I doubled the wadding just to make the rug a bit thicker. I think I'll make more since the cork potholders keep going MIA from the kitchen.
Found another leftover from a previous project. The scrap was pretty small and I thought it would be perfect to make another essential oil pouch. I like how this one turned out because I was able to use other scrap fabric for it. The black garter fit the look perfectly.
Here's how I made it -
Can't wait to see what I could do with the tinier pieces of scrap fabric. I want to utilize the scraps for something useful. I could also use my scrap project to practice and improve my quilting skills :)
I'm so glad Shirni taught me how to cook gyoza. I tried making it on my own, but her mixture is so much better so I gave up making my own. I just normally buy ready to cook from the supermarket. It tastes so much better than what I make. Maybe someday I'll try making it from scratch again, haha.
Anyway, we got some ready to cook chicken gyoza made by Tokyo Tokyo. We just chanced upon it at the grocery and thought we'd try it. Buying ready to cook stuff is a hit and miss, but we were willing to try since it's tedious to make gyoza from scratch.
The package didn't come with instructions and I couldn't find any online. I decided to use the technique Shirni taught me many years ago when we lived in Singapore. Shirni is a Malaysian friend and she makes the most amazing gyoza (and gyoza sauce) on earth. She taught me how to cook and how to make the mixture. I never managed to get the mixture correctly, so I just wait whenever she sends me a tupperware of prepared meat. It will probably take a long time before I could sample her gyoza again, so have to make do for now with ready to cook ones available in the supermarket.
Since I couldn't find any instructions on how to cook the Tokyo Tokyo pack, I decided to just use Shirni's technique. I asked Miggy to help document it since it might be useful for others who want to try. I don't remember if we were taught how to make dumplings in foods class and Daddy only made siomai at home. Gyoza isn't really a staple in our culture, so thought this video would be useful. Here ya go :)
The Tokyo Tokyo chicken gyoza was pretty tasty. We only realized later on that we should have halved the package. We finished all 24 pieces for dinner and we felt so full even after bedtime (hahaha). Also, probably need to find how to prepare the sauce. We just used black vinegar. Recos for other ready to cook gyoza is welcome!
Thought I'd match the quilted laptop sleeve I made for my friend with a small pouch. She could use it as a pencil case or for knick-knacks. It would fit the pocket of the laptop sleeve or she could put it in her bag. I originally wanted to make a pot holder or coaster, but she probably won't use it. My friends who I gave mug rugs ended up just displaying the project. They said it's too precious (hehe). I want to make items that are useful, so I thought a pouch/pencil case would be better to make.
I also wanted to improve my skills. I have a friend who makes amazing bags in all shapes and sizes, with zippers! So this project was meant to test my zipper skills. It did not disappoint because I made a mistake adding the lining. I had to remove the stitches and that took at least 30 minutes, hahaha.
The project just took one night to make. I made it while watching some YouTube videos. It was a great way to be productive and it required me to move between the family room (where I sew now) and my maker room (where all my stuff is). We were home bound the past week anyway because of the typhoon. This week I have to schedule my pulmo rehab. Hopefully no more typhoons for the time-being.
Well, here's how I made the pouch with a zipper -
Special thanks to Sweetie for lending me his toy studio so I could take a nicer photo of the project, hehe. Here's how it looks under ispesyal lights -
I looked for Little Twin Stars fabric when I found out from a friend that she likes them. I have fond memories of Little Twin Stars because my Ate used to keep her trinkets in Little Twin Stars boxes on her dresser. I eventually inherited one of the boxes because I kept nagging (I think Mom gave them to me when she left for the US).
The Little Twin Stars fabric was a bit hard to find. I didn't have that many options when I found it online. I think more options are available in Tomato in Tokyo. Anyway, after months of debating on what I should make for my friend, I eventually decided on a laptop sleeve. I think it'll be useful and she can use it everyday.
Of course, a quilt isn't a quilt if you don't add other fabrics to it. I asked Miggy for help since he's good with colors. After finding out what laptop my friend used, I then proceeded to design and plan the project. I just made it simple so that the Little Twin Stars fabric would stand out.
The challenging part was making sure that the wadding would be one big piece. I wanted the wadding to help make the sleeve stable. And I also wanted to integrate a pocket in the sleeve. That's something I've never done for the sleeves I previously made (about 5 years ago?). I also had to avoid doing any hand sewing since my arm has just healed. So my other aim was to have clean machine stitches (yes, I still usually make a mess of it).
I think it turned out well. I hope my friend likes it and finds it useful. Here's how I made it -
Measurements, pattern and process at https://www.needleadventures.com/2023/08/little-twin-stars-quilted-laptop-sleeve.html
After six weeks of working on it off and on, I finally finished the new cat quilt cover for my food processor. I adjusted a lot from the Pinterest pin inspiration. Made the cat face wider and I softened the face by making the eyes more pronounced.
The Front
Decided to make another cat to form the back pocket. That's where I'll put the tools of the food processor (so it won't get lost!). I like how it turned out. I also like how the colors nicely merged together.
The Back with pocket.
Here's how I assembled it -
Now, I have to finish the cover for the blender. It's going to be quirky!